

You don’t need a licensed electrician to light up your kitchen. If the thought of drilling into drywall or dealing with high-voltage wiring makes you cringe, you are not alone. Many homeowners in California assume under-cabinet lighting requires a professional. The truth is, with modern plug-in kits, battery-powered pucks, and stick-on LED strips, you can complete a DIY cabinet light installation California project over a weekend with zero electrical experience. This guide walks you through every step, from choosing the right fixtures to hiding those wires like a pro.
What type of cabinet lights can I install without an electrician?
You can install plug-in LED strip lights, battery-operated puck lights, rechargeable motion-sensor bars, and hardwired fixtures that connect to a switched outlet—all without touching a breaker panel. The safest options are low-voltage (12V or 24V) systems that plug into a standard wall outlet.
Plug-in LED strip lights for renters and DIYers
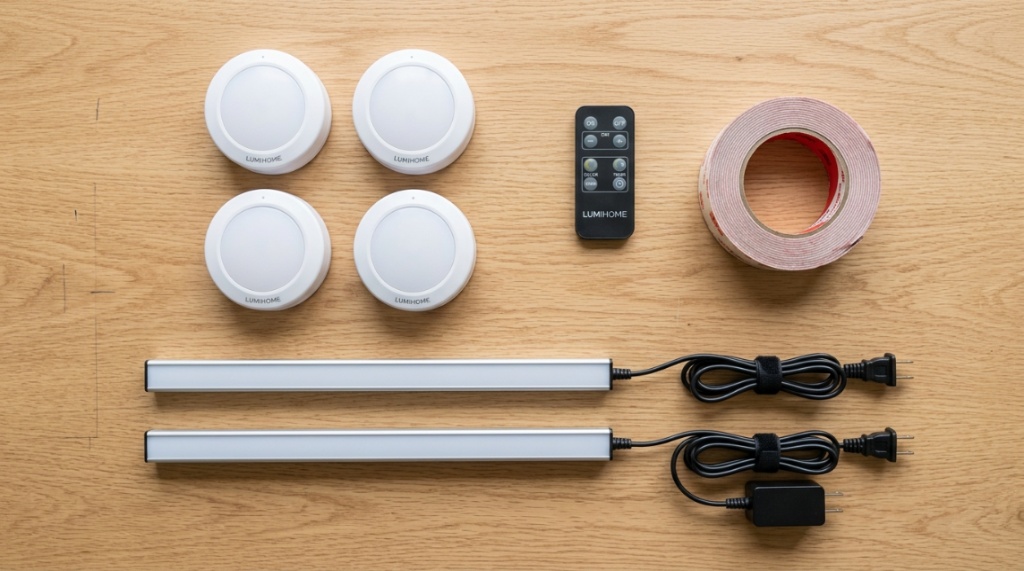
Plug-in strips come with a transformer that converts household voltage to a safe low level. They include an adhesive backing that sticks to the underside of your upper cabinets. Most kits include a remote control or a simple switch. These are the most popular choice for a diy cabinet light installation California because they require zero electrical modifications.
Battery-powered puck lights for quick fixes
Puck lights run on AA batteries or built-in rechargeable cells. They are ideal for closets, pantries, or areas near a sink where running an extension cord is risky. The downside is battery life typically lasts 30–90 days depending on usage, so plan for regular replacements.
Rechargeable motion-sensor bars for hands-free use
These bars mount with magnets or adhesive tape and turn on automatically when you wave a hand nearby. They are great for dark corners under a cabinet. Many rechargeable bars offer a warm-to-cool color temperature adjustment, making them versatile for both task lighting and ambiance.
Which tools do I need for a DIY cabinet light installation?
Gather a measuring tape, level, drill with a small drill bit, wire clips or cable raceways, a screwdriver, and the light kit itself. Most plug-in kits require no cutting or stripping of wires, so a standard toolkit is sufficient.
Essential tools list
- Measuring tape
- Pencil for marking positions
- Level (a 24-inch level or a laser level)
- Drill with a 1/8-inch bit (if you need to screw mounts into cabinet bottoms)
- Cable clips, adhesive wire channels, or zip ties
- Screwdriver (Phillips or flathead depending on your kit)
- Step stool or ladder
Tools you might not need
You will not need wire strippers, electrical tape, a voltage tester, or a junction box. Stick-on LED strips bypass all high-voltage work. If you buy a kit with a plug-in transformer, the hardest part is managing the cord to the outlet.
How do I plan the layout for under-cabinet lighting?
Measure the length of each cabinet section. Mark where you want the lights to start and end. For strip lights, a continuous run between cabinets looks cleanest. For puck lights, space them 12–18 inches apart. Draw a simple sketch before you start sticking anything.
Step-by-step layout planning
- Measure each cabinet section from edge to edge. If you have a gap between upper cabinets, measure that distance too.
- Decide on a power source. If your kitchen has a switched outlet above the counter, you can plug the light strip directly into it. Otherwise, plan to run the cord to an under-sink outlet or a nearby plug.
- Check for obstructions. Look at the underside of your cabinets. Are there seams, hinges, or decorative molding that would block a straight light line?
- Mark the mounting spots. Use a pencil to mark the corners where the strip or pucks will sit. Use a level to ensure the line is straight.
Common layout mistakes to avoid
Do not place lights too far back near the cabinet face. Position them roughly one inch from the front edge so the light shines on the countertop, not the cabinet sides. Also avoid placing lights directly over the stovetop; heat can damage adhesive strips.
Can I hide the wires without cutting into the wall?
Yes. Use adhesive-backed cable raceways that match your cabinet color, or run the wire along the back of the cabinet and down the side. Many kits include small clips that keep the cord flush against the cabinet bottom.
Using cable raceways for a professional look
Plastic raceways are paintable to match your trim. Cut them to length with snips, peel off the backing, and press them along the edge of the cabinet bottom. Feed the wire inside and snap the cover on. This hides the wire completely and costs less than $10 per section.
Running wires through cabinet interiors
If your upper cabinets sit above a base cabinet, you can drill a small hole in the corner of each cabinet interior. Pass the wire through the hole, then plug it into an outlet hidden under the sink. This method keeps all wires invisible from the outside. Seal the hole with a small grommet for a finished look.
How do I install plug-in LED strip lights correctly?
Clean the cabinet underside with rubbing alcohol to remove grease. Peel the liner from the adhesive strip and press it along your marked line. Connect the strip to the transformer, then plug the transformer into the wall. If your strip is longer than needed, cut it at the marked cut line (usually every 1–2 inches).
Surface preparation is critical
Adhesive strips will not stick to dusty, greasy cabinet bottoms. Wipe the area with a microfiber cloth and isopropyl alcohol. Wait 2–3 minutes for the alcohol to evaporate completely before applying the strip. In warm kitchens, use a heat gun or hairdryer on low to warm the adhesive for a stronger bond.
Connecting multiple strips
Most kits include connector cables to join two strips. Measure the distance between cabinet sections and order a jumper cable of the correct length. Avoid daisy-chaining more than three strips on a single transformer to prevent voltage drop and dimming.
Which is better for DIY: hardwired lights or plug-in lights?
Plug-in lights are better for anyone without electrical experience. Hardwired lights require cutting into drywall, connecting to a switch box, and following local code—which in California often demands a permit for new wiring. Stick with plug-in options for a true DIY experience.
| Feature | Plug-in Lights | Hardwired Lights |
|---|---|---|
| Installation time | 30–60 minutes | 2–4 hours (or more) |
| Electrical knowledge required | None | Intermediate to advanced |
| Permit needed (California) | No | Often required |
| Aesthetic (wires hidden) | With raceways, yes | Yes, inside wall |
| Cost | $20–$80 | $150–$400 |
When hardwired might still make sense
If you are remodeling your entire kitchen and the walls are already open, hiring an electrician to run a dedicated circuit might be worth the investment. But for a simple lighting upgrade in an existing kitchen, plug-in wins every time.
How do I handle outlets and switches for cabinet lights?
Most plug-in LED strips come with a remote or a simple in-line switch. If you want a wall switch, use a smart plug that fits into the outlet and pairs with your phone or voice assistant. No wiring needed.
Using smart plugs for voice control
Plug your transformer into a smart outlet. Connect the smart outlet to your Wi-Fi, then use Alexa or Google Assistant to turn the lights on and off. You can set schedules so the lights come on at dusk. This is a $15 solution that requires zero electrical work.
Adding a switch without cutting drywall
Battery-powered remote switches stick to any wall surface with adhesive. Pair the remote with your light kit, then mount the remote wherever convenient—no wires, no patching, no permits.
What safety precautions should I take during installation?
Turn off power to any nearby outlets you will plug into. Never cut an LED strip while it is plugged in. Do not route cords across countertops near water. Keep all connections dry and away from the sink to prevent shock hazards.
Specific warnings for California kitchens
California has strict building codes regarding electrical work. Placing a plug-in light cord across a countertop within six inches of a sink violates code. Always route cords behind the counter or under the cabinet. If your kitchen has a garbage disposal or dishwasher outlet under the sink, that is usually a safe plug-in point. Hardwiring new fixtures can be incredibly difficult if your home has outdated wiring. If you are currently dealing with aging infrastructure, check out what to look out for when buying an older property to avoid costly electrical traps. For this lighting project, however, we will bypass the old wiring entirely by using simple, battery-operated puck lights
What to do if the lights flicker
Flickering usually means the transformer is overloaded or the connection is loose. Unplug the system, check the connections between strip segments, and ensure the transformer wattage matches the strip length. If the flicker continues, replace the transformer—it is inexpensive and widely available.
How do I choose the right color temperature for cabinet lights?
For task lighting (food prep, reading recipes), choose 4000K–5000K (cool white). For ambient lighting or a cozy feel, choose 2700K–3000K (warm white). Many modern LED strips offer adjustable color temperatures so you can switch between modes.
Testing color options before buying
Buy a single strip first. Mount it temporarily with painter’s tape and test it at night with your existing kitchen lights off. Cabinets, countertops, and backsplashes all reflect light differently, so seeing it in your actual space is the only way to be sure.
Matching with existing kitchen lighting
If your overhead lights are warm (2700K), stick with warm cabinet lights. A mix of cool and warm light in the same room looks disjointed. If you prefer a modern look, switch all kitchen bulbs to 3000K–3500K, which is a neutral white that works with almost any decor.
Can I install cabinet lights if my cabinets have glass doors?
Yes. Mount the strip lights on the inside top of the cabinet frame (inside the top, not underneath). The light will shine down through the glass shelves, creating a beautiful display effect. Use frosted or white strips to diffuse the light and avoid harsh glare.
Installation tips for glass-front cabinets
If you have glass shelves, consider drilling a small hole in the back of the cabinet to run the wire. Alternatively, use battery-operated pucks inside each glass compartment. For a display-worthy look, use a strip with a 90-degree corner connector so the light wraps around the inside perimeter.
Avoiding heat damage to collectibles
LED strips produce very little heat compared to halogen pucks, but still avoid placing them directly against delicate items like antique glassware or vinyl records. Leave a 1-inch gap between the strip and any stored objects.
What is the best way to maintain LED cabinet lights?
Dust the strips with a dry microfiber cloth every few weeks. Check adhesive backing yearly, especially in humid kitchens. Replace batteries in puck lights every 2–3 months. If a strip dims over time, the LED driver may need replacement—these are sold separately for under $10.
Cleaning without damaging the LEDs
Do not spray cleaner directly onto the lights. Instead, spray a cloth with glass cleaner and gently wipe the surface. Avoid abrasive pads that can scratch the silicone coating on waterproof strips.
Extending the life of your lights
Keep the transformer in a ventilated area, not inside a closed cabinet. Heat is the number one cause of LED failure. If you notice the transformer feeling hot to the touch, move it to a cooler spot and consider upgrading to a higher-wattage unit.
For a curated list of reliable, affordable options perfect for a diy cabinet light installation California, check out top-rated LED strips that meet local energy standards and last for years.
Frequently Asked Questions
Do I need a permit to install cabinet lights in California?
No, not for plug-in or battery-operated lights. Hardwired installations that involve new wiring or connecting to a junction box typically require a permit under California Electrical Code. Stick with plug-in fixtures to stay code-compliant without a permit.
Can I connect LED strips to a dimmer switch?
Only if the LED strip and transformer are rated as dimmable. Many budget strips are not dimmable and will flicker or buzz if connected to a standard dimmer. Look for packaging that says “dimmable with compatible LED dimmer.”
How long do LED cabinet lights last?
Typically 30,000–50,000 hours. If you use them 4 hours per day, that is about 20–35 years. The transformer or driver may fail sooner, usually after 10–15 years.
Will LED strips damage my cabinet paint or finish?
No, LEDs emit virtually no heat and do not release UV rays that fade finishes. The adhesive backing is the only risk—some low-tack adhesives can leave a residue if removed. Test a small area before applying.
Can I install cabinet lights under granite countertops?
Yes. The lights mount to the underside of the upper cabinet, not the countertop. Just ensure the lights are positioned to shine onto the granite surface without being blocked by the countertop edge.
What if my kitchen has no outlet near the cabinets?
Use rechargeable battery lights or run a flat extension cord along the backsplash using cord covers that match your tile. Avoid running cords across countertops. For a flush look, have an electrician add an outlet above the cabinet—this is a small job that does not require full rewiring.
Are magnetic mount lights better than adhesive lights?
Magnetic mounts are easier to remove and reposition, making them ideal for renters. Adhesive strips provide a more permanent, invisible installation. If you own your home, adhesive strips generally look better.