So, you’ve noticed that your bathroom faucet isn’t functioning as smoothly as it used to. Maybe it’s dripping incessantly, or the water flow is uneven. It could be time to roll up your sleeves and tackle the issue head-on. Removing a bathroom faucet valve might sound like a daunting task, but fear not! With a few simple steps and the right tools, you can become a DIY plumbing pro in no time. In this guide, we’ll walk you through the process of removing a bathroom faucet valve and give you some handy tips along the way. This article is presented by Esscnyc.com.
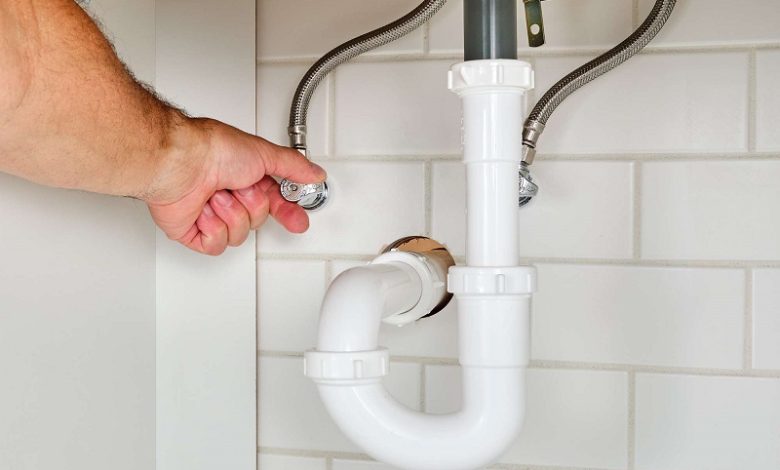
Turning Off the Water Supply
Before you begin your faucet-fixing adventure, the first crucial step is to turn off the water supply. You don’t want any unexpected waterworks while you’re working on your faucet. Locate the shut-off valve under the sink – it’s usually a small knob that you can turn clockwise to shut off the water. This will ensure a dry and hassle-free experience. Let’s discover the steps to remove shower handle.
Removing the Faucet Handle
Now that the water supply is safely turned off, it’s time to remove the faucet handle. The handle is usually held in place by a small screw located on the underside. Grab a screwdriver, and with a quick twist, remove that screw. Once the screw is out, gently lift the handle off the faucet. Voila! You’ve just unlocked the gateway to your faucet’s internals.
Unleashing the Retaining Nut
Beneath the handle, you’ll find a retaining nut that’s holding the faucet valve snugly in place. Use your trusty wrench to give this nut a counter-clockwise turn. As the nut loosens its grip, you’ll feel the valve becoming more accessible.
Gently Coaxing Out the Valve
With the retaining nut loosened, it’s time for a delicate touch. You might need a pair of pliers for this step. Gently grasp the valve and pull it out of the faucet body. If the valve seems reluctant to leave its cozy spot, don’t force it. Instead, try using some penetrating oil to ease its departure. A little patience can go a long way.
Inspecting and Deciding
Once the valve is in your hands, take a moment to inspect it closely. Look for signs of damage or wear that might be causing your faucet woes. If you spot any issues, it’s time to bid farewell to the old valve and welcome a new one. Head to your local hardware store and find a replacement that matches your old valve’s specifications.
Prepping the New Valve
Before you install the new valve, give the inside of the faucet body a good clean. A little scrubbing can prevent future problems. To ensure smooth operation, apply a thin layer of faucet grease to the threads of the valve stem. This lubrication will make sure your new valve slides in effortlessly.
The Grand Installation
With your new valve prepped and ready, it’s time for the grand installation. Gently insert the valve into the faucet body, aligning it with the opening. Tighten the retaining nut by turning it clockwise. Remember, a snug fit is all you need – there’s no need to go Hulk on that nut. Overtightening can lead to unnecessary damage.
Reattaching the Handle and Testing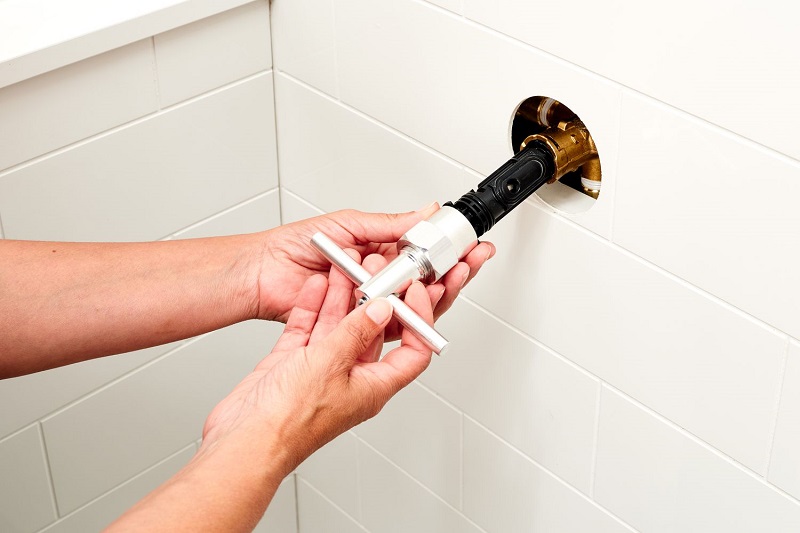
You’re almost there! Reattach the faucet handle by placing it back onto the valve stem and securing it with the screw you removed earlier. Once the handle is in place, it’s time to turn the water supply back on. Give it a slow and steady turn, and then stand back as the water flows smoothly again. Test your faucet to ensure everything is working as it should – no leaks, no drips, just the satisfying sound of a fully operational faucet.
Conclusion
Congratulations, you’ve successfully removed and replaced a bathroom faucet valve! With a bit of patience, some basic tools, and a touch of DIY spirit, you’ve tackled a plumbing challenge like a pro. Now you can enjoy the fruits of your labor every time you turn on your faucet.
FAQs
Can I use any type of penetrating oil?
Absolutely! Any penetrating oil should do the trick. Just remember to use it sparingly.
Do I need to turn off the main water supply to the house?
Nope, just turning off the shut-off valve under the sink will suffice.
How often should I replace my bathroom faucet valve?
It depends on usage, but every few years is a good rule of thumb.
What if the valve is stuck even after using penetrating oil?
If the valve is stubborn, consider seeking professional help to avoid causing more damage.
Is faucet grease essential for the new valve?
While not mandatory, using faucet grease ensures smooth operation and prevents future issues.