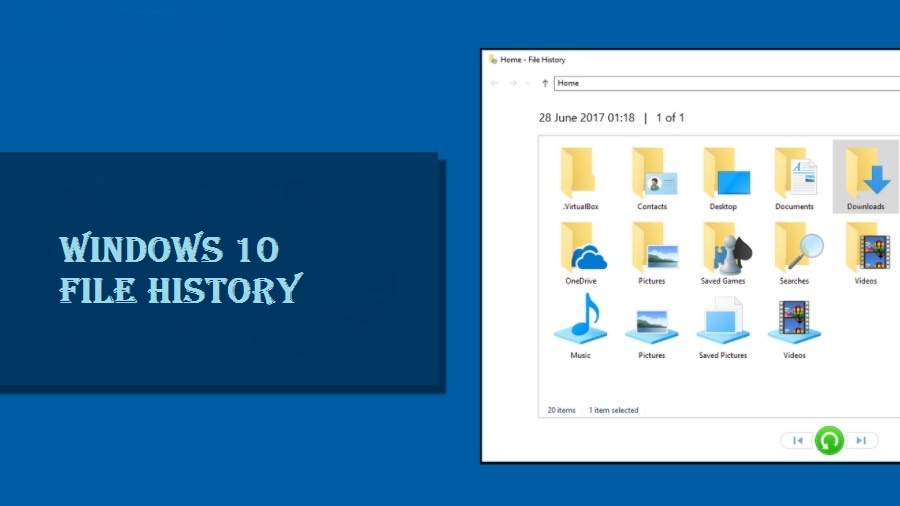
File history Windows 10 is an amazing and secret tool of Windows 10. Every day we use more and more our electronic devices to store music, photos, videos, and documents. We have become accustomed to having on our computer the photos of our trips or events, as well as the favorite music. Checking how easy it is to have everything at hand, and be able to see it on the television in the living room, on our mobile or tablet But, have you thought about what happened if, by accident or hardware problem, you lose your computer?
We are sure that many of you have thought about this possibility and will be making backup copies manually, every so often. And others had not even fallen on how to protect that information. Therefore, today we want to tell you how we can make Windows 10 take care of these backup copies easily and almost transparently for the user. This will allow us the file history.
What is the file history Windows 10?
Let’s start by explaining a little the functionality of the file history. The whole system is based on using an external hard drive, connected to our computer, or better still if we have it in a network at home or in the office. Thus, you can use hard drives connected to our router if you allow it, or a NAS hard disk with the network. For example, or a computer that we always have on with a shared drive. Any of these solutions are valid.
Once we have configured that unit where we are going to store the information, what the system will do is check every so often (one hour by default) if there are changes in our personal files. These files are usually the bookstores that we have or any directory that we indicate. If you find changes, it will copy the file to the unit that we have indicated. In this way, that file is safe in the destination to a possible problem in the computer where we have it.
But not only copy the file and crush in the destination. But every time you copy a new version is created. This will allow us to return to a file that we may have several days ago. Hence, not only serves as a copy of current security but as indicated by its name, file history.
Activate file history Windows 10
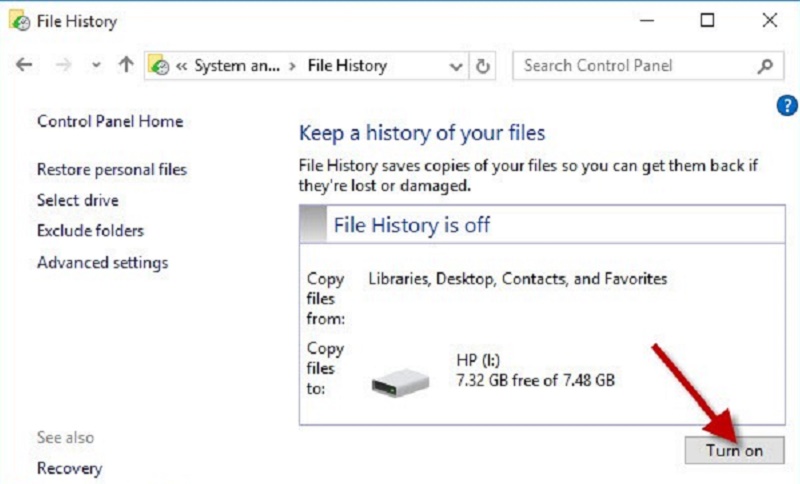
The first step to configure our file history is to indicate the destination unit of the backup. For this, we will go to the configuration in our computer. Then we will go to the section of update and security and click on the section of backup. There we will see the option to add a unit.
A drop-down will appear where you can choose the external units or network units. We will choose the one that interests us, and with only that option the file history will be activated.
Configure file history
Once the file history is activated, we can proceed to configure it to our liking. For this, we will press on more options entering the screen to configure. So we can:
- See the size of the current backup (in my case it says 0 bytes since it was the first one I was going to make).
- See the total space in the unit where the backup is being performed
- See the date and time of the last backup
- Button to make a backup at that time if we are interested in some reason.
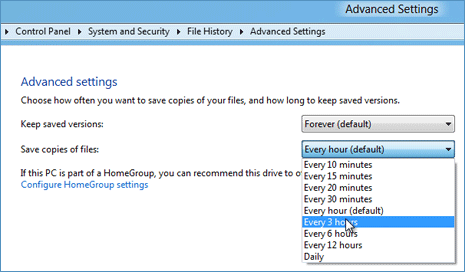
And we can also tell you how often the backup will take place. You can indicate:
- Every 10 minutes
- Every 15 minutes
- Every 20 minutes
- Every 30 minutes
- Hourly (default)
- Every 3 hours
- Every 6 hours
- Every 12 hours
- Daily
And finally, because as we have said, file versions are maintained with each change, we can indicate how long those versions will be maintained. By default, it appears that unlimitedly, but be careful because this can fill our unit. But in my case, since I have several computers making backup copies in the same unit, I have indicated that 1 month. I’m not interested in older files. In any case, they can be configured as:
- Until space is needed
- 1 month
- 2 months
- 3 months
- 6 months
- 9 months
- 1 year
- 2 years
- Forever
You can also configure which folders are the ones that will be included for the backup, and which folders will be excluded. Very useful, for example, if you do not want to make a backup of your movies but of the home videos that you have recorded.
How to restore with file history
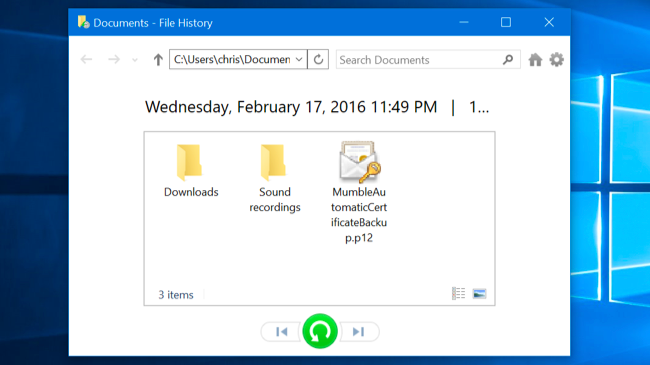
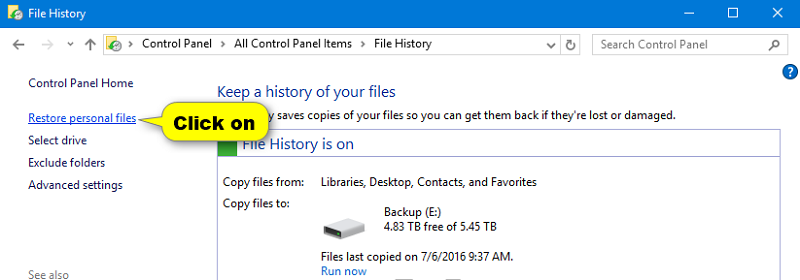
If it is necessary to recover a file from the history, you will have to go to the end of this screen, to the section of related configuration options. There you can see the option to restore files from a current backup. Clicking on it, a window will open in which you can see all the files copied, folder by folder. Also, with the lower arrows, you can navigate between the different available dates, being able to restore a file with a long time version.
Once we have chosen the elements that we want to restore, just click on the green bottom button, and the system will prepare to copy and restore the files in the origin location. If it is not found, do not worry, it will propose another location. As simple as that, you can recover an erased file or a previous version.
It’s automatic, yes, but what if the copy fails?
We have seen how Windows 10, once everything is configured, will automatically make backup copies. But, how can we be sure that it will be done and there are no problems? It could be that we think that the copy is being made, but it is not, and when we go to restore a file, we find the surprise that it has not been copied.
Well, you can rest assured, since Windows 10 will warn you with a message in the notification center if you spend too much time without being able to back up for any reason. So that if you do not see any message, you can be calm about its operation.

