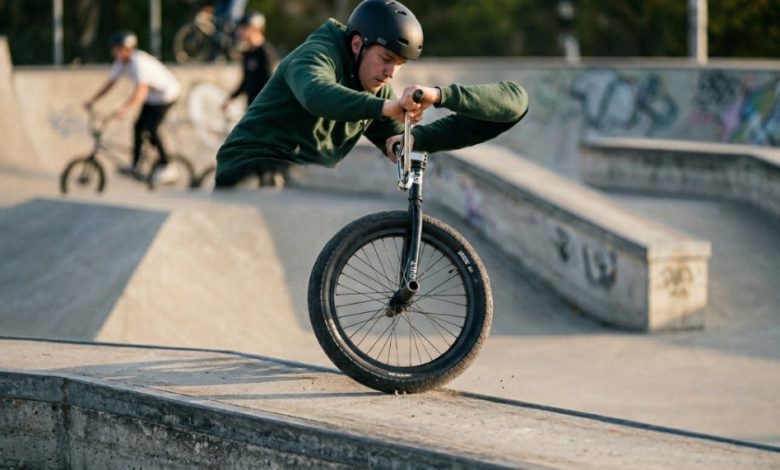
A set of quality BMX tires costs $40–$80, and most riders burn through them in 3–6 months when they should be lasting 8–12 months with the same riding intensity. The difference isn’t riding style or tire brand — it’s inflation technique. BMX tire maintenance through proper inflation directly controls tread wear patterns, sidewall stress, and bead integrity in ways that add months of life to every set of tires you mount. Underinflation causes sidewall fatigue cracking and accelerated center-tread wear. Overinflation causes premature crown wear and reduces impact absorption that protects both tire and rim.
BMX tire maintenance encompasses all practices that extend tire functional life — from pressure management and inflation technique to rotation, inspection, and storage. A bicycle tire pump used correctly is the single most impactful tire maintenance tool you own, because consistent proper inflation prevents the three primary tire failure modes: sidewall cracking from flex fatigue, bead unseating from underinflation impacts, and uneven tread wear from incorrect pressure distribution.
This guide covers specific inflation techniques — not just “check your pressure” general advice — that measurably extend BMX tire life based on how tires actually degrade under riding stress.
How Does Incorrect Inflation Destroy BMX Tires Prematurely?
Underinflation causes excessive sidewall flexing that generates heat and fatigue cracking within 2–3 months. Overinflation concentrates all wear on the narrow tire crown, burning through the center tread while leaving edge tread unused. Both shorten tire life by 30–50% compared to optimal pressure.
Damage mechanisms by inflation error:
| Inflation Error | Damage Mechanism | Visible Result | Life Reduction |
|---|---|---|---|
| 10+ PSI Under | Excessive sidewall flex generates heat, breaks rubber molecular bonds | Horizontal cracking along sidewall after 2–3 months | 30–40% shorter life |
| 5–10 PSI Under | Wider contact patch increases center tread friction, accelerates wear | Center tread worn flat while edges remain fresh | 20–30% shorter life |
| 5–10 PSI Over | Narrower contact patch concentrates all forces on tire crown | Crown strip worn through while side tread is barely touched | 15–25% shorter life |
| 10+ PSI Over | Reduced shock absorption transmits impacts to tire structure, weakens casing | Cuts and punctures from debris that normally wouldn’t penetrate, premature casing failure | 25–40% shorter life |
| Correct Pressure | Even tread contact, controlled sidewall flex, optimal impact absorption | Uniform wear across tread width, no sidewall damage | Maximum tire life achieved |
The optimal pressure isn’t a single number — it’s a range that balances even tread contact with adequate sidewall support for your specific tire width and riding weight.
What Is the Correct Inflation Technique for Maximum BMX Tire Life?
Inflate in two stages: a fast initial fill to 80% of target pressure, then slow, controlled strokes to reach exact target PSI. This two-stage approach seats the bead evenly, prevents tube pinching during inflation, and allows you to listen and feel for proper air distribution as the tire reaches operating pressure.
Step-by-step inflation technique:
- Stage 1 — Fast fill (0% to 80% of target): Pump with full, fast strokes. The goal is volume, not precision. This seats the tire bead evenly around the rim and centers the tube inside the tire.
- Stage 2 — Precision fill (80% to 100% of target): Slow, controlled half-strokes. Watch the gauge closely. Listen for any irregular sounds (hissing = leak, popping = bead seating). Stop exactly at target PSI.
- Stage 3 — Verification: Remove pump head. Wait 10 seconds. Recheck pressure with the gauge. The reading should be within 1 PSI of target. If significantly lower, the pump head connection lost air — reattach and top off.
Why this matters for tire life: fast inflation to full pressure without pausing can seat the bead unevenly — one section sitting higher on the rim than others. This creates a high spot that wears faster during riding. The two-stage approach gives the bead time to settle evenly before reaching full pressure.
How Often Should You Inflate BMX Tires for Maximum Longevity?
Inflate to your target PSI before every riding session. Tires naturally lose 1–3 PSI daily, and riding at even 5 PSI below optimal accelerates wear measurably. The pre-ride inflation habit is the single most impactful tire life extension practice available — more effective than tire sealant, rotation, or any other maintenance step.
Inflation frequency by rider type:
- Daily rider (5+ sessions/week): Check and top off before every session. Takes 30–60 seconds with a floor pump positioned near your bike. Non-negotiable for tire longevity.
- Weekend rider (2–3 sessions/week): Check before each ride. Tires may lose 5–10 PSI between sessions. Always inflate to target — never ride on whatever pressure remains from last time.
- Casual rider (once weekly or less): Check before every ride. Tires may lose 10–15 PSI between rides. Full reinflation required each time. Consider slightly higher quality tubes that permeate less air.
The math is simple: if a tire loses 2 PSI per day and you ride every day without checking, by Friday you’re 10 PSI under target. That’s five days of accelerated wear that compounds over the tire’s lifetime.
Does Inflation Speed Affect Tire and Tube Integrity?
Extremely fast inflation (gas station compressor speed) risks unseating the bead, pinching the tube against the rim, and creating localized stress points in the tire casing. Manual floor pump speed is ideal — fast enough to be efficient but controlled enough to prevent damage.
Inflation speed guidelines:
- Too fast (compressor/CO2 without control): Air rushes in faster than it distributes evenly. The tube can bulge on one side, creating a thin spot that becomes a future blowout point. The bead can seat unevenly or “pop” over the rim edge.
- Ideal speed (floor pump, full strokes): Air enters at a rate the tire structure can accommodate evenly. The tube inflates uniformly, the bead seats progressively, and you can hear/feel any issues developing in time to stop.
- Too slow (mini pump, partial strokes): Not harmful to the tire, but frustrating and incomplete. Air temperature changes during the long inflation process can affect final pressure accuracy.
If using a CO2 inflator for emergencies, release gas in 2–3 short bursts rather than one continuous blast. This gives the tire structure time to equalize between fills and prevents localized tube ballooning.
How Does Temperature Management During Inflation Extend Tire Life?
Always inflate when tires are cold (before riding, not after). Hot tires read 3–5 PSI higher than actual cold pressure due to heat expansion. Setting pressure on hot tires means you’ll be underinflated once they cool — riding the next session on unintentionally low pressure that accelerates sidewall wear.
Temperature-aware inflation practices:
- Always inflate cold: Before riding, after the bike has sat for at least 30 minutes in ambient temperature. This gives you the true baseline pressure reading.
- Summer adjustment: On hot days (90°F+), inflation done in a cool garage will read 2–3 PSI higher once the tire heats in the sun. This slight over-reading is acceptable — it provides a small buffer against the pressure drop of the first few minutes of riding.
- Winter adjustment: Cold garage inflation + cold riding conditions means what you set is what you get. No adjustment needed in winter.
- Post-ride warning: Never check or adjust pressure immediately after riding. Friction-heated tires show falsely high readings. Wait 30+ minutes for cool-down before trusting a pressure reading.
For a reliable pump that provides consistent gauge readings regardless of attachment speed or temperature conditions, the top-rated BMX bike pump guide recommends models tested for gauge consistency across multiple temperature conditions.
What Role Does Even Bead Seating Play in Tire Longevity?
Uneven bead seating creates a high spot on the tire that bounces against the ground with every rotation — accelerating wear at that point 3–5x faster than the rest of the tread. Proper inflation technique combined with visual bead verification after mounting extends tire life significantly by ensuring uniform tread contact.
Bead seating verification process:
- After mounting a new tire: Inflate to 80% pressure, then visually inspect the bead line (thin molded line running along the tire sidewall just above the rim). It should be equidistant from the rim edge all the way around on both sides.
- If bead is uneven: Deflate completely, break the bead loose with your hands, lubricate the bead with soapy water, and reinflate slowly. The lubrication allows the bead to slide into correct position.
- Final check: Spin the wheel slowly with the tire off the ground. The tire should rotate without visible wobble or height variation. Any wobble indicates uneven bead seating that needs correction before riding.
Riding on an unevenly seated tire creates a flat spot in the tread within weeks — and once the rubber is worn unevenly, it cannot be corrected. The tire is permanently compromised.
Should You Run Different Pressures for Training Versus Competition?
Yes — run 3–5 PSI lower during training sessions to reduce tire stress from repeated impacts, and dial up to optimal performance pressure for competition or serious sessions. The slightly lower training pressure extends tire life by reducing landing impact forces while accepting a small performance trade-off.
Training vs. competition pressure strategy:
- Training sessions (practice, learning new tricks): Run 3–5 PSI below your optimal performance pressure. The lower pressure absorbs more impact energy, reducing stress on tire casing and sidewalls during repeated failed attempts and hard landings.
- Competition/filming sessions: Run your dialed-in optimal pressure for peak performance. The slightly harder tire rolls faster, responds quicker, and holds form better during precise trick execution.
- Long cruising rides: Run 5 PSI above normal if covering distance — reduced rolling resistance saves energy and reduces center-tread friction heating.
This approach treats tires like any other performance component: managed intensity during training preserves them for peak performance when it matters.
How Does Tire Rotation Extend BMX Tire Life?
Rotating front and rear tires every 4–6 weeks evens out wear because the rear tire wears 2–3x faster than the front due to weight distribution and drive forces. Rotation shares the accelerated rear wear across both tires, extending the total tire set life by 20–30%.
BMX tire rotation protocol:
- When to rotate: Every 4–6 weeks of regular riding, or when rear tire shows visibly more wear than front
- Direction: Move rear tire to front position, front tire to rear position. Don’t reverse rotation direction — keep the same forward-spinning orientation.
- Pressure adjustment after rotation: Remember that rear position needs 5–10 PSI more than front. Adjust pressure to match the tire’s new position, not its old pressure.
- When NOT to rotate: If you run different tire models front and rear by design (some riders prefer grippy rear / slick front for specific riding styles)
Without rotation, a rear tire that lasts 4 months would be paired with a front tire that could last 10 months. Rotation balances this to approximately 7 months each — getting more total use from the same tire investment.
What Storage Inflation Level Preserves Tires Between Riding Seasons?
Store BMX bikes with tires inflated to 50–60% of riding pressure (about 30–40 PSI for most setups). Full deflation allows the tire to fold and develop permanent creases. Full inflation during storage stresses rubber that isn’t experiencing the regular flex-recovery cycle of riding.
Storage best practices:
- Short-term storage (1–4 weeks): Leave at riding pressure. Normal permeation loss is acceptable and will need top-off when you return.
- Medium-term storage (1–3 months): Reduce to 50–60% pressure. Rotate wheels monthly (quarter turn) to prevent flat spots from constant ground contact at the same point.
- Long-term storage (3+ months): Reduce to 50% pressure, hang the bike by frame or remove wheels and store horizontally. UV exposure degrades rubber — store away from direct sunlight and fluorescent lighting.
The enemy of stored tires is UV radiation and ozone (from electric motors and fluorescent lights). A garage with fluorescent lights and a window accelerates rubber degradation on stored tires faster than a dark closet or opaque bike cover.
Keeping your tires at the optimal pressure is much easier when your bike is stable and secure while you work. If you are tired of leaning your ride against walls or working on the ground, understanding What is a BMX Bike Stand For: Unleashing the Power of BMX Riding can completely change your maintenance routine. A proper workspace setup not only makes inflating your tires safer and more accurate, but it also prevents accidental frame scratches and keeps your bike ready to ride at a moment’s notice.
Conclusion
Extending BMX tire life through proper inflation technique isn’t complicated — it’s consistent. Inflate cold before every ride using a two-stage technique (fast fill to 80%, precision to target). Verify bead seating after mounting. Run slightly lower pressure during training to reduce impact stress. Rotate tires every 4–6 weeks. Store at partial pressure away from UV. These BMX tire maintenance practices collectively add 3–6 months to every tire set — saving $80–$160 annually while maintaining the performance your tires were designed to deliver.
A reliable bicycle tire pump with an accurate gauge is the foundation of every practice listed above. Find one tested for BMX accuracy at the top-rated BMX bike pump resource and start building the 30-second pre-ride habit today.
How long do your BMX tires typically last? Share your brand, riding discipline, and replacement frequency in the comments — tire longevity data from real riders helps everyone benchmark their maintenance effectiveness.
Frequently Asked Questions
Can proper inflation alone double BMX tire life?
Proper inflation can extend tire life by 30–50% — not quite doubling, but significant. Combined with rotation, proper storage, and bead maintenance, total tire life improvements of 50–80% are achievable. A tire lasting 4 months with poor maintenance might last 6–7 months with proper inflation practices and rotation.
Does tire pressure affect puncture resistance?
Yes. Slightly higher pressure (5 PSI above minimum riding pressure) increases puncture resistance by creating a firmer casing that debris has difficulty penetrating. However, too-high pressure reduces the casing’s ability to deform around sharp objects — there’s an optimal zone that balances puncture resistance with flex-absorption.
How do I know when a BMX tire is too worn to ride safely?
Replace BMX tires when: the center tread pattern is worn smooth (no visible knob or groove depth), the fabric casing threads are visible through worn rubber anywhere, the sidewall shows cracking deeper than surface-level weathering, or the tire won’t hold pressure for more than 24 hours (indicating casing failure letting air seep through).
Does tire sealant help extend BMX tire life?
Sealant prevents small punctures from causing flats but doesn’t extend structural tire life. It’s useful for riders frequently encountering glass, thorns, or debris, but it won’t prevent wear-related tire failure. Think of sealant as flat prevention, not life extension — proper inflation technique handles longevity.
Should I use nitrogen instead of regular air in BMX tires?
No. Nitrogen’s benefit (slower permeation) is negligible in bicycle tires due to their small volume and frequent pressure checks. Nitrogen fills cost extra and provide no measurable BMX tire life benefit. Regular compressed air through a standard bicycle tire pump is optimal for BMX applications.
How does rider weight affect tire pressure and longevity?
Heavier riders (170+ lbs) should run 5–10 PSI higher than standard recommendations to prevent excessive sidewall flex under load. This additional pressure compensates for the greater force compressing the tire per rotation, maintaining proper tire shape and preventing the accelerated sidewall fatigue that occurs when heavy riders run pressures designed for 130–150 lb riders.
Can I repair a tire with sidewall cracking from underinflation damage?
No. Sidewall cracking from flex fatigue is structural damage — the rubber molecular bonds are permanently broken. No sealant, patch, or repair addresses this type of degradation. Once sidewall cracks appear, the tire is in its final phase of useful life. Continue riding cautiously but plan for replacement within 2–4 weeks.